Table of Contents
Goals of this Guide
- Learn the basics of Trophy Fishing Online 2
- Select a fishing location.
- Select a lure.
- Catch your first fish.
- Catch more fish.
- Get paid.
Chapter 1. Lots of Data
Logging in for the First Time
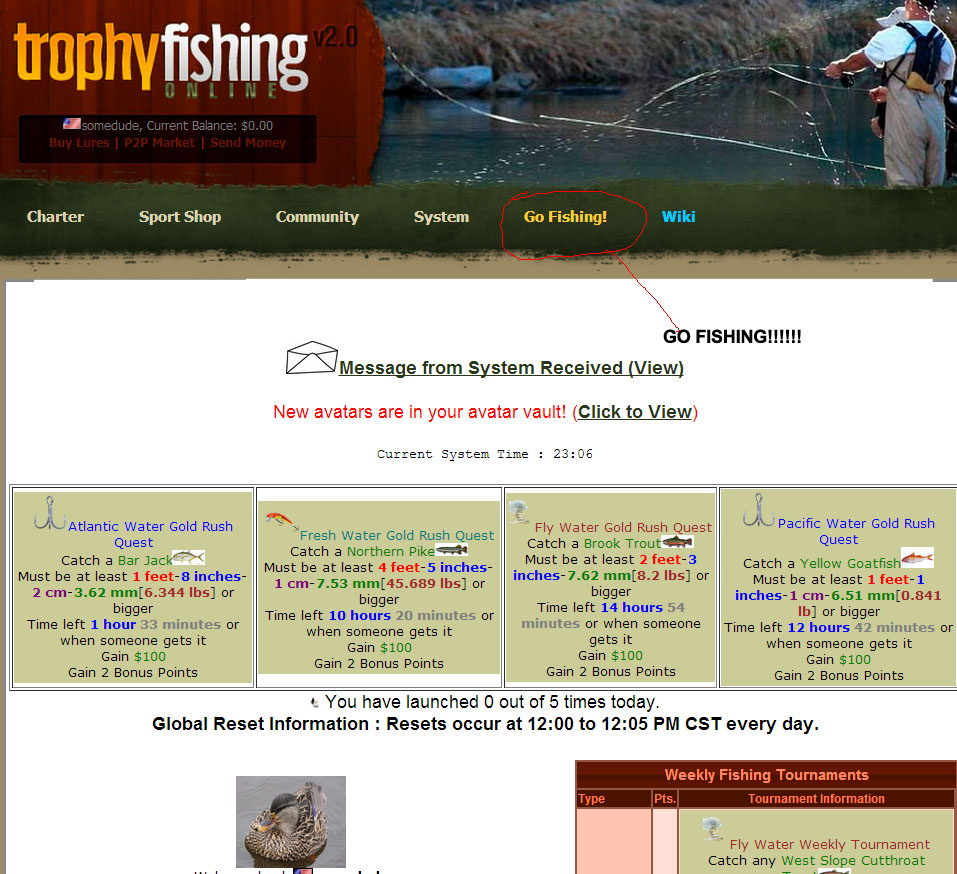
When you log on for the first time, you will be at the Charter Page. This is a general hub of information. As a new player, you will likely be unable to compete in anything so it can largely be ignored at this point.
You may clear the “alerts for avatars” and “system messages” by simply clicking them once so they go away at anytime, just don't lost your place in the walkthrough. You can always return to the Charter Page by clicking Charter→Your Homepage
The goal of this walkthrough is to do one thing - get you on the water and catch your first fish in TFO2. You do not need to buy anything as you start automatically with 10 lures appropriate for where you are going. Like a traditional RPG type game, you start at “Level 1” in the sense you only have 1 area unlocked in Flyfishing and the most basic skills for it.
To begin, we are going to our first fishing area - “Taylor Creek”.
Selecting Our First Fishing Location
Click “Go Fishing!” on the top menu bar. It is in YELLOW.
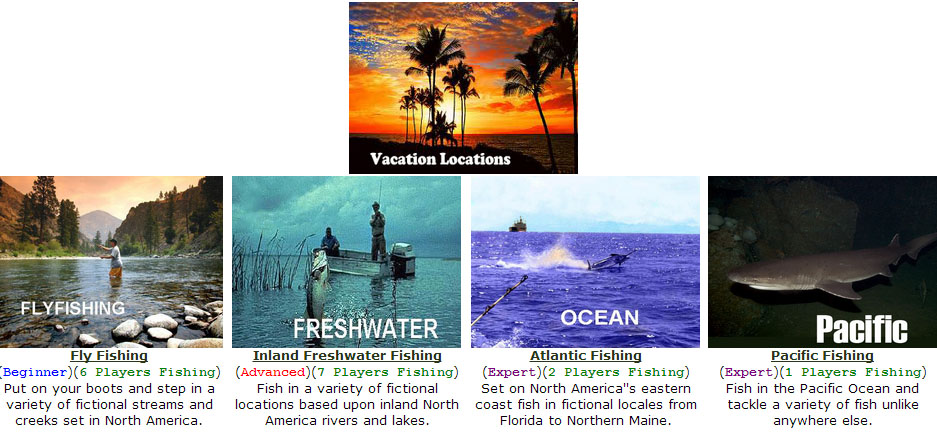
Select Flyfishing. This is the furthest left category.
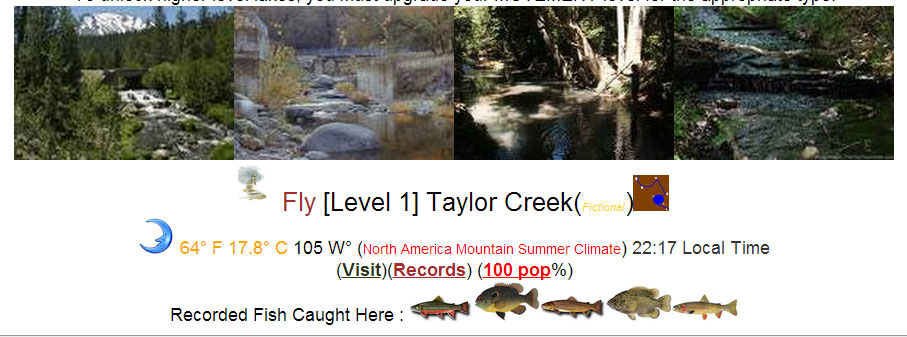
The only location listed is Taylor Creek. You can view a lot of information on each area as it is unlocked including photos, fish caught there, current weather conditions and more.
Click (Visit) below “Taylor Creek”.
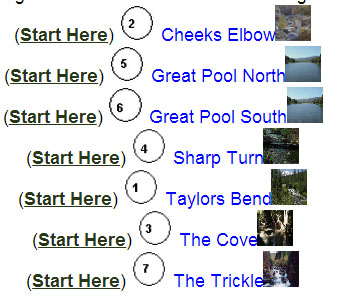
On the following screen, you'll see a list of various fishing locations within Taylor's Creek. Because it is a Flyfishing location, you can start anywhere since you are not using a boat. In other locations, you can generally only start and leave at a certain location.
For the purposes of this tutorial click “(Start Here)” next to Great Pool North (Number 5).
Chapter 2. We're on the Water
Congratulations, you've begun your first fishing expedition! Each expedition can last 4 hours of REAL-TIME before you must cash out.
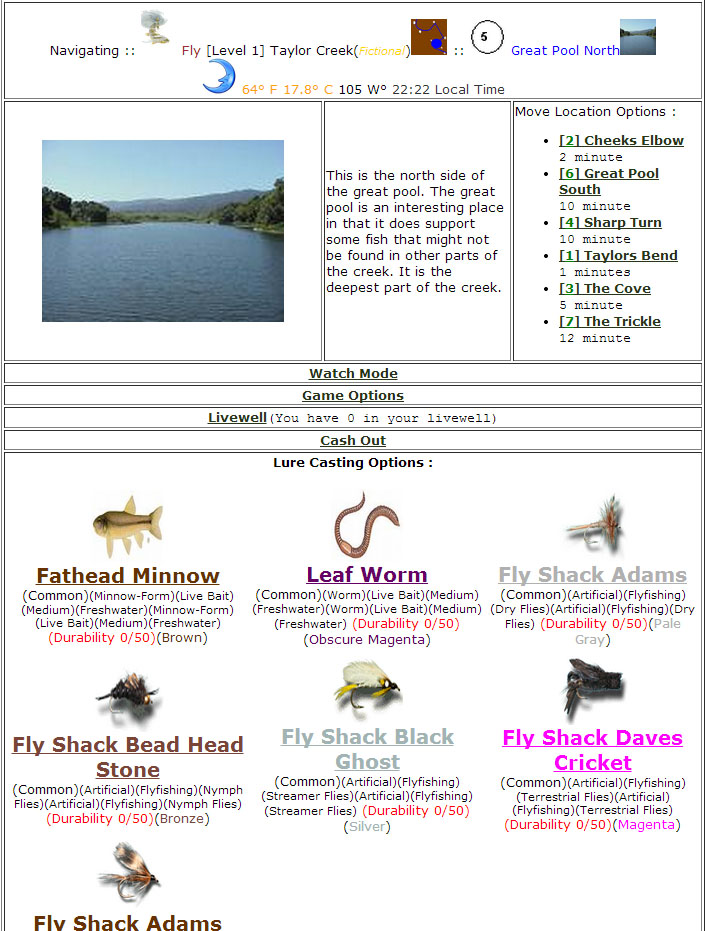
You will see a screen that looks pretty similar to below. The temperature, lure colors or other information may have changed but you should be in the Great Pool North with the same lures.
Do not use any of the following things but quick explanations :
The “Move Location Options” allows you to change to other locations on the same body of water.
“Watch Mode” allows you to view the water.
“Game Options” allows you to change options like sound or refresh rates.
“Livewell” allows you to release fish in your Livewell and view what you have.
“Cash Out” is how you end a fishing expedition and receive money and credit for the fish you have. You must ALWAYS cash out at the end of a fishing expedition. Again, because you are in Flyfishing, you can cash out from ANY location.
Ready to cast? Move to the next section.
Casting our Lure
See where it says “Fathead Minnow”, “Leaf Worm”, “Fly Shack Adams”, etc.? That is how you select your lure for casting. Simply CLICK the picture of the lure to begin casting. For the purposes of this tutorial try the Leaf Worm.
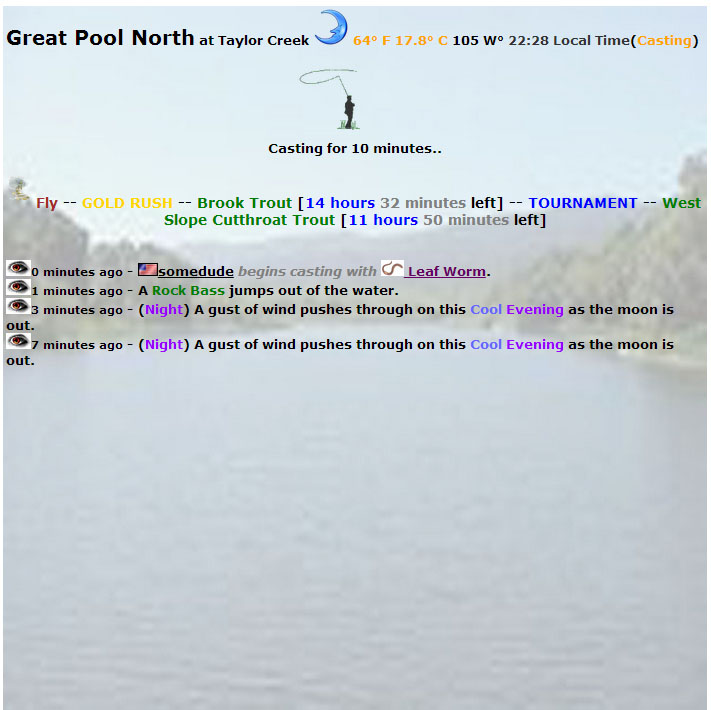
You should now see the below :
This is the CASTING screen. You will see lots of things on this screen including weather conditions, other players fishing, fish jumping out of water and who knows what else! You will leave your browser open to this window and wait for a bite.
Be patient, it may take up to 5-6 minutes at times waiting for a fish here. Because the game in these moments does not require much hands on play, many players do other things and relax while waiting for a bite.
Have you gotten a bite yet?
You will hear many bloop type sounds which sounds like a bubble popping. If your sound is off, look for a large fish on the line!! alerts on various pages of the screen and click it. The game is meant to be played with sound on simply due to the audible alerts. It is possible to play without sound but you need to more attentive to the tab/browser as you play.
As soon as you can, click the “fish on the line!!” alert and you will move on to the next screen.
Fighting our First Fish
Fish come in many shapes, weights and species. This is your first fish and it could honestly be a “PERFECT” classified fish, something you'll see once every few months if you're lucky OR it could be a wimpy. Because of this, your experiences in this section may wildly differ.
Quick Explanation of the Fish Fighting Screen
Above is the example of what I see. Your “Fish Fighting Rating” is basically your “level”. All players start at 31%. On the right side, you'll see the “Fish stats”. Fish Title defines the “rarity” of the fish you are encountering. It can range from Wimpy I to Perfect. Fish Level is the “level” of the fish and its difficulty. Challenge Rating is a simple verbose expression to explain the difficulty of the fish against your level. Lastly, fish endurance decreases as you fight fish giving you a slight advantage the longer a fish is on the line.
Reeling in Our Fish - Basics
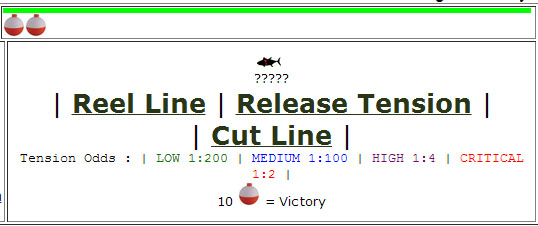
The basic idea of the game is to reel in a fish without breaking the line. Anytime you click “Reel Line” there is a chance the line will break, increase the line tension, have the fish pull away or reel in the fish.
As you can see, the line is GREEN when you begin fighting the fish. You can see the long bright green line above your | Reel Line | Release Tension | Cut Line | options.
The time has come - Click reel.
In my above picture, I clicked REEL and 2 bobbers ![]() have appeared adjacent to the GREEN LINE. Depending on what happens for you, you may have a BLUE LINE, 1 Bobber, 2 Bobbers OR the fish broke the line. All of these are possible.
have appeared adjacent to the GREEN LINE. Depending on what happens for you, you may have a BLUE LINE, 1 Bobber, 2 Bobbers OR the fish broke the line. All of these are possible.
If your fish is gone already, chances are you hooked a fish bigger than you could handle presently OR you got unlucky. I recommend following the steps from Casting Our Lure again in the above section and hooking a second fish or as many as needed until you can proceed to the next part.
Is the fish still on?
If the fish is still on the line, you will want to continue to click REEL when the line is GREEN or BLUE.
If the line turns PURPLE or RED, I suggest clicking RELEASE which will “ease” the tension of the line. You CANNOT use release unless you have a ![]() bobber to sacrifice.
bobber to sacrifice.
When you get 10 ![]() bobbers, you will have caught your first fish.
bobbers, you will have caught your first fish.
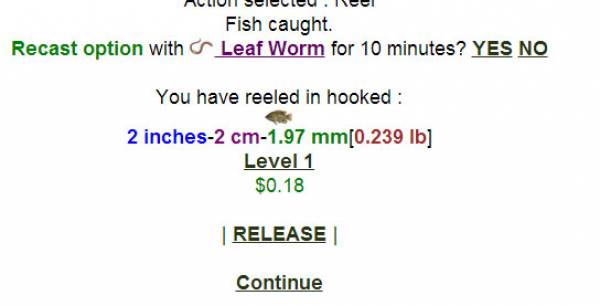
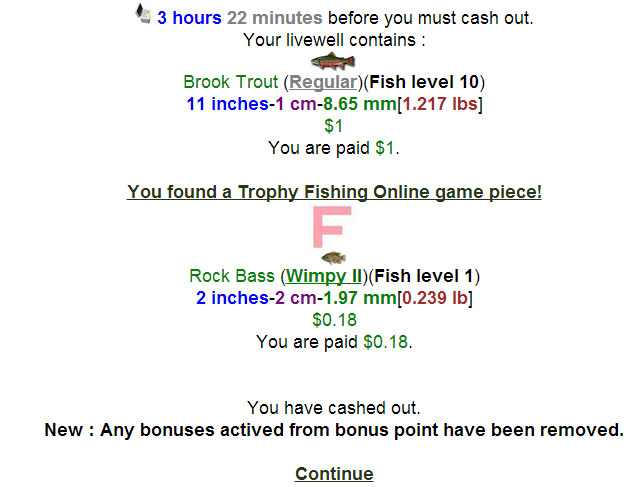
Below is the example of the fish I caught. A TINY Rock Bass worth a measly $.18
Chapter 3. Wrapping Things Up
Got your first fish in Chapter 2 yet? If not, make sure you've caught a fish before reading this part. You can easily start Chapter 2 again by clicking “Go Fishing!” again to access the main fishing area interface.
So the game basically comes down to a repeating factor - Cast a lure, hook a fish, fight a fish and hopefully reel in a fish. You repeat the concepts in Chapter 2 until you have 5 fish(or more). Feel free to explore other locations within Taylor's Creek by clicking on the Move Location Options section. Each location has different fish and different fish populations than each other so it is worth exploring and taking notes.
Time to Get Paid
So you'll notice up until now, you still have $0.00. You do not get paid until you click the CASH-OUT from the main “Go Fishing” panel that we dealt with earlier where we saw Movement Options, Livewell, etc. You can always access this by clicking “Go Fishing” while not fighting a fish.
You may have to release fish depending upon bag limits and how many fish you have of each species. A maximum of 5 fish can ever be cashed out and some species do not allow a certain amount of cash-outs. You'll be alerted to what is illegal when you are attempting to cash-out if its applicable.
If all is well, you should see a complete list of all the fish you caught on this trip as well as income.
After clicking “Continue” you will find yourself back at the main Charter page with the increased money and probably some message.
Speeding Yourself Along
So that is how the game works in the simplest of ways.
- You select a body of water in “Go Fishing”, for starting players it'd be in the Flyfishing section.
- You select where you want to start fishing.
- You select a lure to cast or move as desired.
- You cash-out before 4 hours is up or when you're done fishing.
You are allowed 5 boat launches per day with reset times around 12:00-12:05 CST.
Advanced stages of the game involve Equipment investment(this is leveling up and accessing new areas), competing against other players in tournaments, buying lures beyond flyfishing and common stuff and of course, a ton of other enjoyable aspects to this “easy-to-learn, difficult-to-master” game.
Premium Store
There are a ton of boosts and options to speed yourself up to catch up to other players in the Premium Store of TFO2 such as cash-increasing boosts or simply generating lures and selling them to other players. As a new player I highly suggest Sponsorships, Fish Fighting and Money boosts to get a fast start if you are to make purchases. Lure generation can also be invaluable if you take the time to learn the market system.
